If cake be the food of love…
If you’re wanting a truly bespoke gift for someone then how about creating a hamper for them? A wicker basket, a bottle of port and some smelly cheese may be lovely for some but thinking outside the box 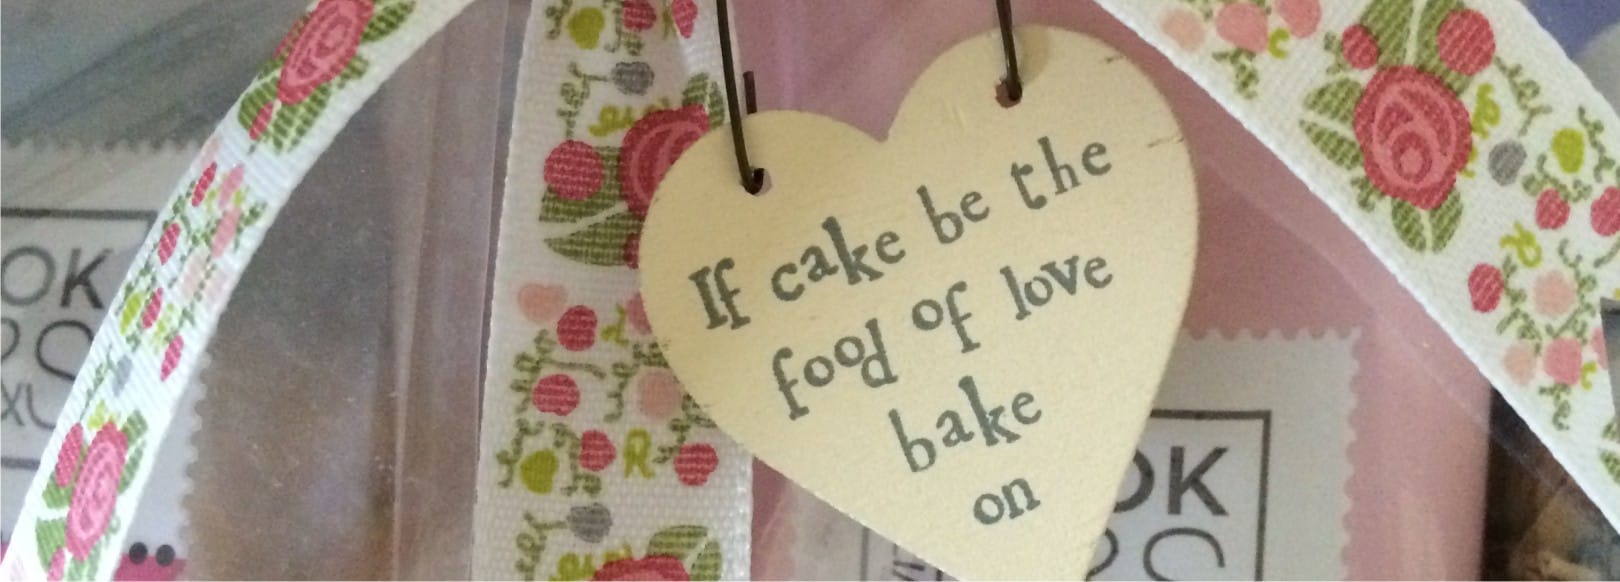 (or wicker basket) can mean you end up with a more personal gift which you’ll have a great deal of fun creating!
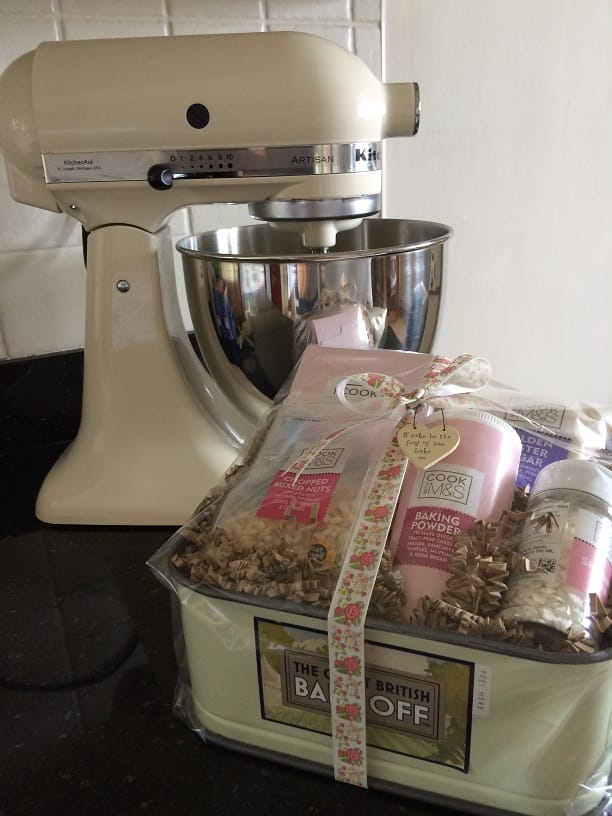
Like this pretty baking hamper (pictured below). Just perfect for someone with a passion for baking and a thing for pink! (That’ll be my friend Jenny then!). Indeed, tried and tested and the results were good…She was thrilled to pieces when I gave it to her for her birthday and I knew that the baking tin I’d used as the container would come to good use over the years! Now that’s a bonus…Time for tea and cake anyone? Jenny does make the most gorgeous cake (Do I get lots of ‘friend points’ and an extra slice of cake for pointing this out?)
So, as it’s good to share, should you fancy a go at creating one or something similar and need a helping hand, you can find our tips below. Enjoy!
Our tips to creating a perfectly pretty baking hamper!
- The first thing you’ll need is a container for your products. Remember that it needs to be large enough to fit a variety of products in so have a think about what you’ll be putting in and ensure it’s the right size, not just in length or width but height too! We chose a baking tin but you could use an open cake tin (with the lid sitting underneath), a mixing bowl or something else that fits with your baking theme.
- Once you have your container, it’s time to get the products to go inside. As well as baking ingredients what about a cookery magazine/book, tea towel, wooden spoon or baking accessories? Do take time to think about the size, colour and shape of the items you’ll be adding as this can make a big difference to how the finished hamper will look. A variety of items that are tall, smaller, wider, thinner etc will all help to create interest. If you can pick products with colors that co-ordinate with one another (as we did for ours) that works best but don’t worry if not…There are ways you can tie colors together!
- Before you add your items its a good idea to line your container with some paper or tissue paper is it will help to prevent any damage to the base from the products you place inside. Add your products creating height at the back and then coming lower to the front. If something isn’t tall enough or you need it to be more angled, use scrunched up paper underneath or to the side to create the desired look and when you’re happy with it all, fill in any gaps with paper to hold the products securely before adding your decorative top layer. We’ve used paper straw but you could use shredded tissue etc but do pick wisely, as the right color can really help to tie your products together and show them off at their best!
- Now it’s time to wrap it all up in cellophane, securing underneath with sticky tape and add a ribbon/bow/decorative touch. Again, use something that will co-ordinate and tie all the colors together. We’ve used some gorgeous Julie Dodsworth Ribbon and to complete the look we’ve tied in a little wooden heart keepsake from our own collection at moreprettythings.co.uk which says ‘If cake be the food of love bake on’.
- Voila! You’ve created a perfectly pretty baking hamper just perfect for that special someone!
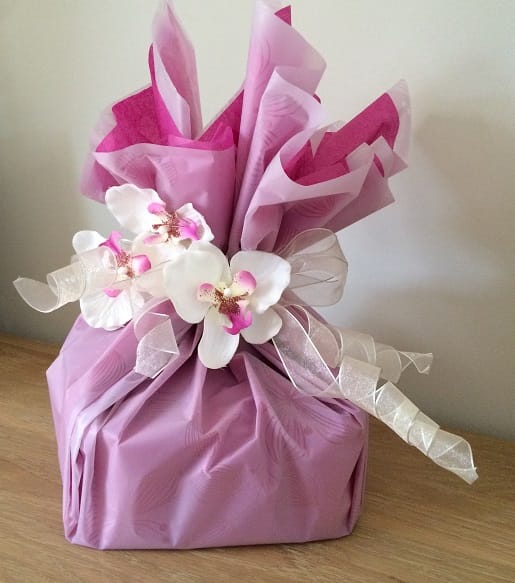
Now, even with hampers I like to give the element of surprise by wrapping it up …So, the question is, how do you attractively wrap an oddly shaped hamper? That’s easy ……
Find out more about our Gift Wrapping Workshops at www.moreprettythings.co.uk
No Comments