Home Baked with Love – Honey and Almond Heart Biscuits Recipe
A good recipe is worth sharing and so this months blog is here to share the love (of a good recipe!)
Years ago I found a lovely honey and almond biscuit recipe in a magazine but (like you do) I tore out the page and over the years this became crumpled, ripped and covered in ingredients and so it then become a recipe from memory.
Of course at times, I’d go to get things from the baking shelf only to find that I was missing this or that so it also ended up altering a little over time too!
What hasn’t altered though is the tradition of baking these tasty biscuits several times a year and adding in the newest generations of family members that not only love to eat them but love to help make them too.
It’s a nice easy recipe, so great for anyone who wants fuss free baking but allowing for those that like to faff and decorate biscuits to do that too if they fancy it!
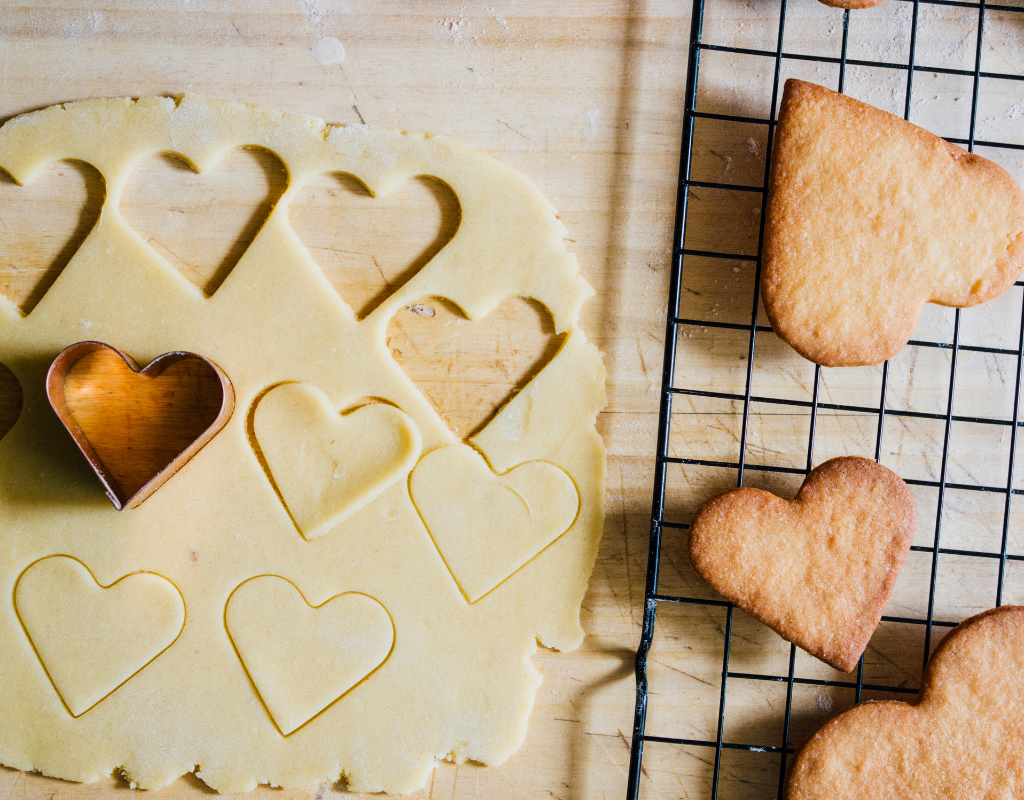
I seem to have amassed a variety of cookie cutters over the years, so mostly tend to keep the biscuits plain and use a cutter suited to the occasion / season (always stars and deer at Christmastime) and with Valentines Day looming (and Easter not far behind it!) then it seemed the perfect time to share this recipe with you, as once baked they can be prettily packaged to make a lovely gift for loved ones or friends.
Indeed, as I was making a batch to correspond with this blog, a lovely friend just happened to drop by and we devoured a couple that were freshly baked and still warm, over a cuppa and a catch up. Perfect timing Lesley!
Ingredients: 190g plain flour (sifted), 130g butter (left to soften) or a soft spread substitute, 60g ground almonds, 20g Light Golden Brown Sugar (but works just as well with caster sugar), 2 tbsp honey (I use whatever I have in the cupboard), 1 & 1/2 tsp vanilla bean paste.
Toppings/Decoration: As we mentioned before this recipe doesn’t require any toppings. However, if you do wish to decorate them there are many options from popping a simple slither of almond in the middle of them prior to baking, to waiting until they are cool and covering in chocolate or icing!
Materials we used…
Weighing Scales, Bowl, Rolling Pin, Spatula or Wooden Spoon, Cookie Cutters (of various sizes), Clingfilm or a reusable Wax Cloth (to wrap the dough in while it’s resting), Baking Parchment, Baking Tray, Cooling Rack.
Oven Temperature…
I bake mine at 150°C (in a rangemaster fan oven which I know cooks a little bit higher temperature than the 150 it shows on the dial) however if you feel that’s too low then just turn up a little (or bake for longer) but do watch you don’t overbake!
Making/Baking Times: It really is a quick method and takes just a few minutes to combine all the ingredients, then you leave it to rest in a cool place or the fridge for up to an hour (which can be quite handy of you’ve other jobs to do!) Once you return to it, it’s a few more minutes to roll it out and then it will take 12-15 mins cooking time.
Method:
Put all the ingredients ie the butter, sugar, honey, vanilla paste, flour and ground almonds in a bowl and briefly stir together with the spatula/wooden spoon but then remove this and work the mixture by hand into a dough.
It’s really important not to overwork, the mixture should come together after a short time into a dough and then needs to be placed somewhere cool or refrigerated for between 30 and 60 minutes. Note: Leaving it too long in the fridge may cause it to harden too much …I once left it overnight and had used block butter so it took a good few hours to soften up enough to roll it out and then it was a little flaky and more ‘rustic’ looking once cooked but just as tasty!)
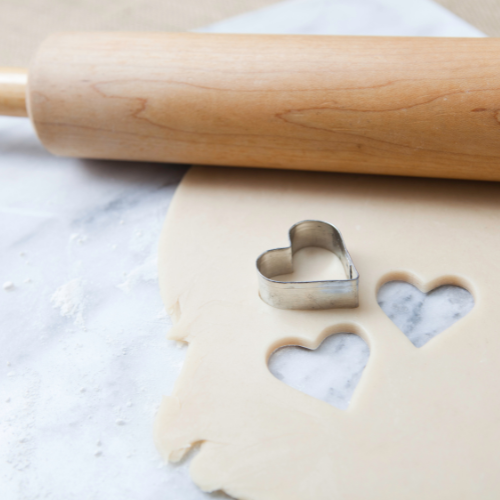
Once it’s rested and you’re ready to roll your pastry, preheat your oven to the desired temperature (see above), lightly flour your surface and roll out your pastry so that its about 4 or 5mm in height. Use your cookie cutter to cut your shape (or cut with a knife and shape as required) and then transfer to your baking parchment lined tray.
Cooking times do vary depending on your oven type and the actual temperature it operates at but I bake them for approx 12 – 15 mins but keep a careful eye on them to ensure they don’t start to overbake….If they begin to look brown they’ve been in too long or your oven is on too high!
And just in case you’ve never baked biscuits before… They are notoriously known to crisp up once they are cool even if they look a little soft when you remove them so never panic. As long as they’re cooked through they’ll be fine!
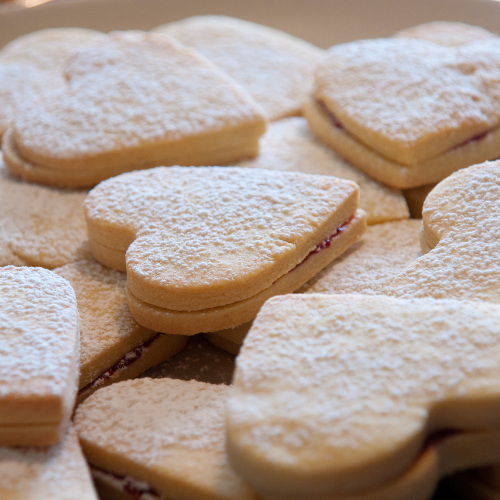
Once baked to perfection by your own fair hands, transfer them to a cooling rack and once cool, leave au natural, decorate as desired or choose to double up and add filling in the middle to make a sandwich type biscuit then just sprinkle with icing sugar! (as per below)

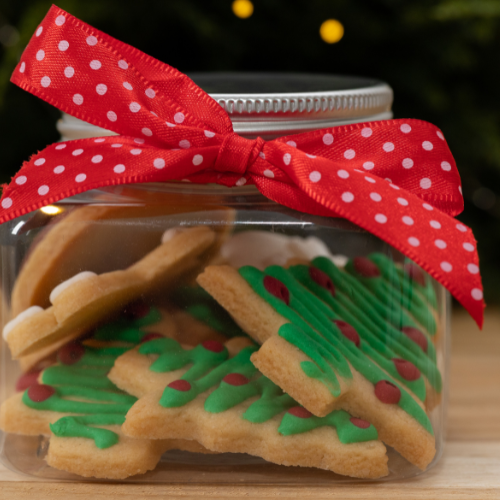
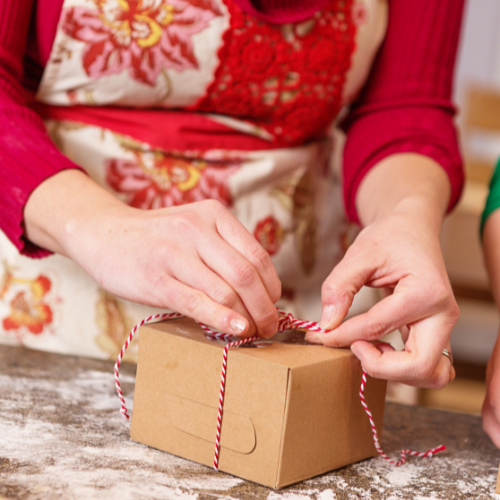
And if you’re thinking of sending some of them as a gift (at any time of year) its always a nice touch to prettily package them. Choose from boxes (lined with baking parchment), block bottom bags or sweetie bags (with the biscuits wrapped in parchment inside), reusable glass jars or cellophane bags. All can be sealed with a pretty sticker or tied with Bakers twine / ribbon and a pretty gift tag attached.
And finally, don’t forget to save some for you …Cup of tea, feet up and enjoy!
Happy baking!
No Comments