
Pretty Paper Boats
Yearning to set sail into the sunset? (Or just after keeping the kids busy while you drift off on the sofa for a bit!)
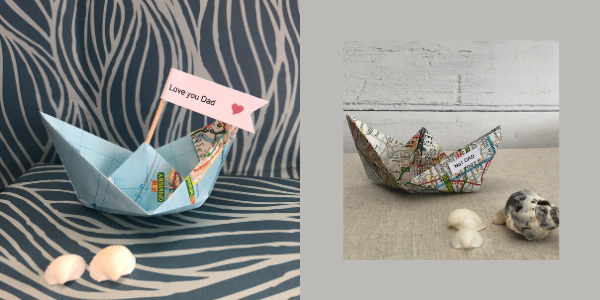
Paper boats are a fun and easy to make, traditional oragami craft. And the best bit, you only need a bit of paper (and the know how) and you’re good to go!
No mess or expense, just a left over piece of wrapping paper or an old map , book page or even wallpaper etc will provide you with all you need to make a perfectly pretty paper boat!
We like to use ours to decorate up wrappings but they also make really pretty home or party decor and if you’ve never had a boat race with one, now’s the time!
Get all the family to make one in different colours and enjoy watching them bob along in the water (The competitive ones of you already planning how to do that on ‘zoom’ I suspect!). And to avoid litter please do ensure you only sail them where you can catch them, recycling them accordingly.
So how do you make one? It’s easy…Just follow our step by step ‘how to’ guide below!
STEP 1:
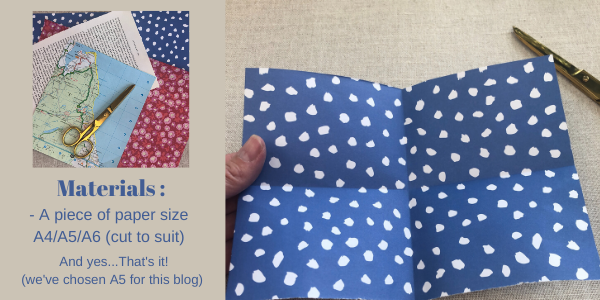
Firstly decide on the size of boat you’d like to make. Working from A4 size (297 x 210mm) simply reduce the size accordingly ie A5/A6. We made ours from some More Pretty Things wrapping paper sized to A5 (198.5 x 210mm). You then need to fold your paper in half an half again then open back up to reveal the indent of the fold. These lines will be your guide.
STEP 2:
Fold your paper in half and with the opening facing you (and pattern inside if you are using single sided paper), fold over one corner an line up with the centre line you created in Step 1. then fold over the other corner and line that up with the centre line. This will form a point at the top.
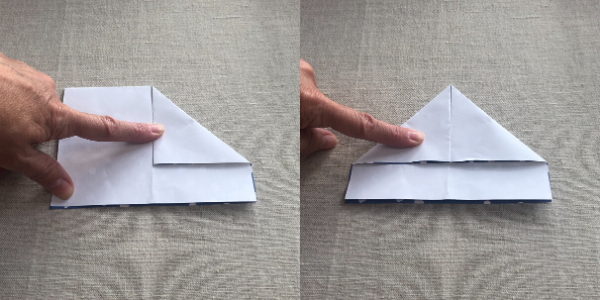
STEP 3:
Fold up the bottom of the paper towards the top (if using single sided paper this will now reveal the pattern. Turn it over and do the same at the other side. Your paper will now look a little bit like a hat!
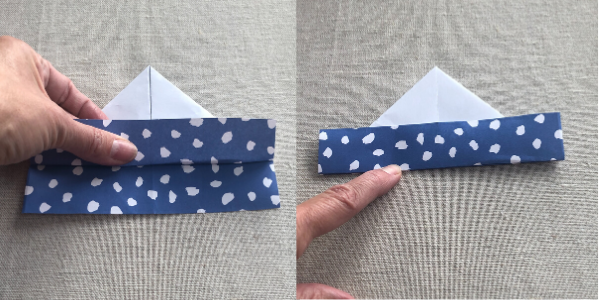
STEP 4:
Open up the bottom of your paper a little (1) then simply just turn your paper to the right by 90 degrees (2) and press down (3) ..tucking in the excess paper under each other. You will end up with a flat shape and should have a point pointing towards you.
STEP 5:
Take the point at the bottom of the paper and fold towards the top point. Turn over and do the same the other side. Your paper will now have a triangular shape but will still be flat.
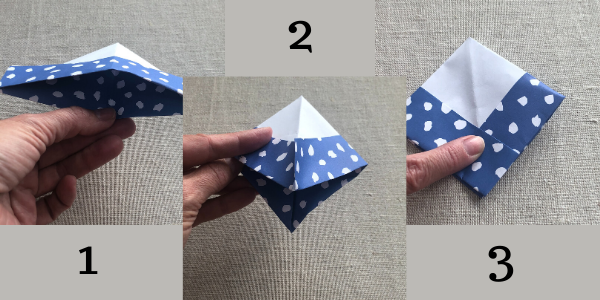
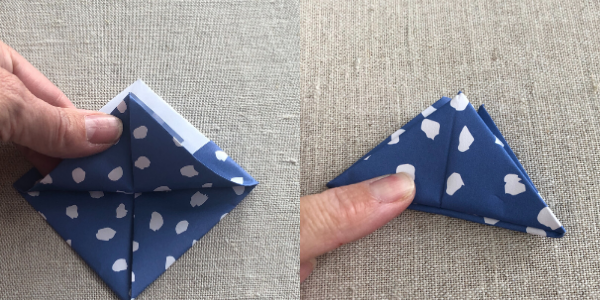
STEP 6:

Pick up your paper shape and open up the bottom a little (1) then turn it to the right by 90 degrees (2) and press down again (3)
STEP 6:
Take the left and right top flap and pull apart then squash flat.
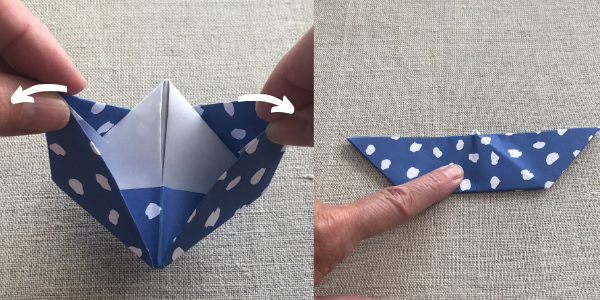
STEP 7:
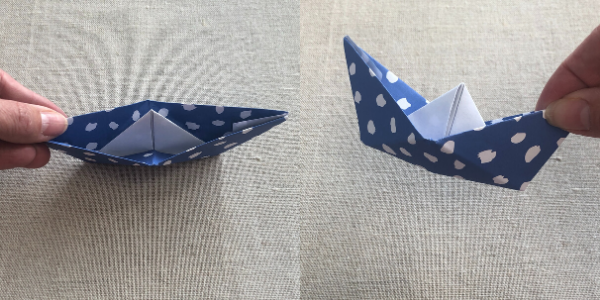
Finally position your paper shape to see into the top and begin to open it out a little one way then the other, plumping up the middle from underneath and there you have it! Your boat is complete!!
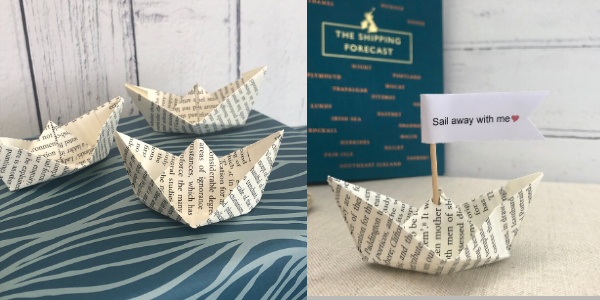
Keep it as it is or add decorations (paper sails or messages) as required and enjoy! Here’s some we’ve made from old book pages…How cute are they?!
And for those looking for Fathers day inspiration…
Did you enjoy our blog? Do let us know below and please feel free to share with others!
No Comments